Ziss Brine Shrimp Hatchery Plus +
Ziss Brine Shrimp Hatchery Plus + is backordered and will ship as soon as it is back in stock.
Delivery and Shipping
Delivery and Shipping
Product Refunds & Returns
- Returns can be processed within 14 days from purchase.
- To return products, they must be in original condition
- Shipping expenses are not refundable
- If your items have been damaged in shipping, please contact us within 24 hours of receipt with photos, and we will assist you.
Livestock Refunds, Returns, & Surrenders
- If you are unhappy with your livestock for any reason, you can bring it back within 72 hours for a full refund; we do not pick up returns

Ziss Brine Shrimp Hatchery Plus +
Ziss Brine Shrimp Hatchery Plus +
Description
Description
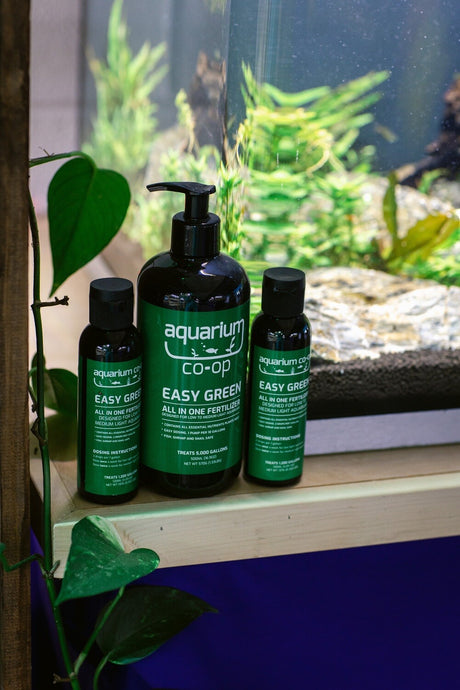
- Holds 2 liters
- Impact-resistant design
- Hangs on a tank or in its stand
Simply put, this is the best brine shrimp hatchery on the market. You may be thinking, "How much better could this be over a 2-liter bottle?" When you hatch live baby brine shrimp every day, the construction and thoughtfulness of this design won't go unnoticed. All of us at Aquarium Co-Op use and love this hatchery. It is made of super strong plastic to withstand an impact and has the option to run a heater and thermometer in it. We highly recommend running this brine shrimp hatchery with the USB Air Pump airline tubing , Aquarium Co-Op Brine Shrimp Eggs and Brine Shrimp Salt (Note that the provided thermometer is in Celsius.)
Note: The height of the hatchery with the stand is about 12.75 inches (32.3 cm), and the height of the hatchery with the stand and height extenders is about 16.5 inches (42 cm). The extra height beneath the hatchery gives you extra room to open the valve when draining out the baby brine shrimp.
Directions/Specifications
Step-by-Step Guide: Hatching Brine Shrimp (youtube.com)
The hatchery kit comes with:
– Hatchery with needle-type valve
– Hatchery lid
– Hatchery stand
– Height extenders for the stand (2)
– Thermometer (measures in Celsius) with o-ring
– Rigid airline tubing
– Pipette
– Air stone (please note that the air stone may be different than what is pictured)
– Air valve
Kit does not include brine shrimp eggs, measuring spoon, air pump, heater, or other equipment.
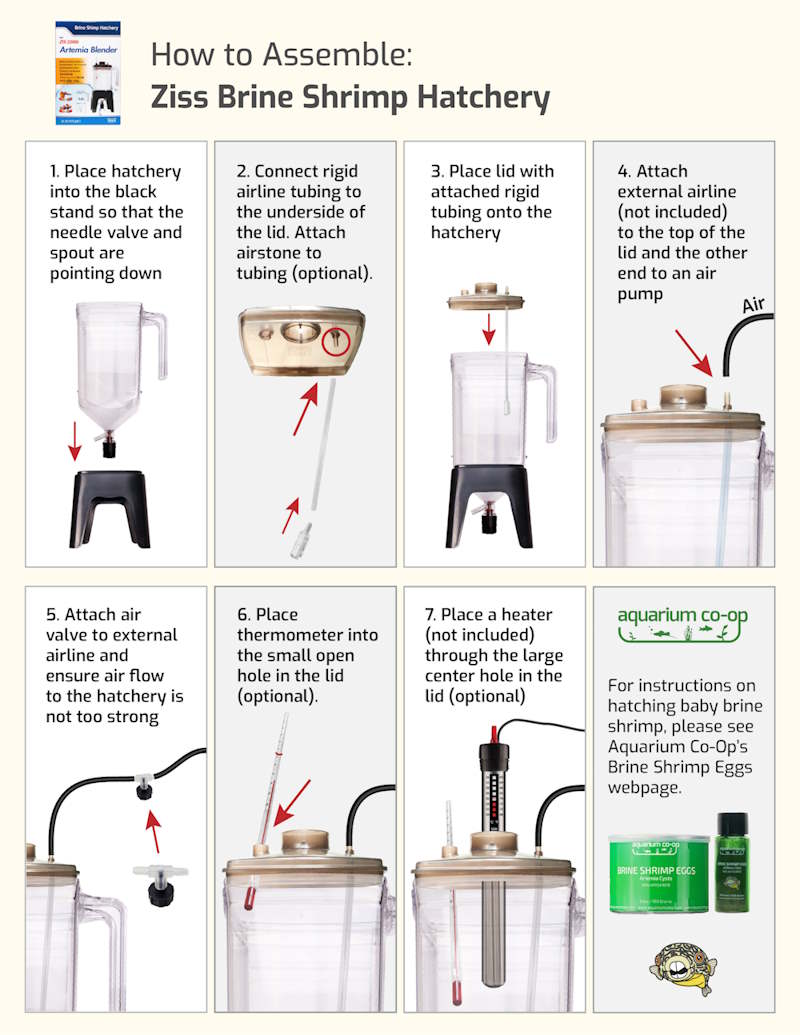
Instructions for Hatching Brine Shrimp:
1. Fill to within 1 inch from the top with water (no dechlorinator).
2. Add 2 tablespoons of salt (we recommend saltwater marine salt, like the Easy Brine Shrimp Salt
3. Add up to 1 tablespoon of eggs.
4. Let hatch for 24 hours (or more depending on temperature).
5. Use a light near the spout to attract brine shrimp for collecting.
6. You can rinse the brine shrimp or feed with the salt water if your tank needs minerals for the live plants or hard water fish.
We don't use the provided air stone in our setup as it makes cleaning harder between hatches. If you wish to use the air stone, you'll need to cut down the rigid tubing. We recommend cleaning by rinsing out well after every use while it's still wet from the previous hatch.
Specifications
Specifications
-
CategoryHatchery
-
Product TypeBrine Shrimp
Payment & Security
Payment methods
Your payment information is processed securely. We do not store credit card details nor have access to your credit card information.